The Ionic Capacitor is a new framework to build cross-platform apps. In this article, we will learn how to set up an Azure DevOps pipeline to build and deploy to AppCenter to distribute to test users.
For simplicity, I am going to build only the android project in this article. You can always add more jobs to run in parallel to build the other environments. Also, I am assuming that you have some experience build Azure pipelines and know about defining variables in the pipeline and how to store secrets in Secure Files and Variables. Please let me know in the comments if there anything specific about the pipeline you don't understand,
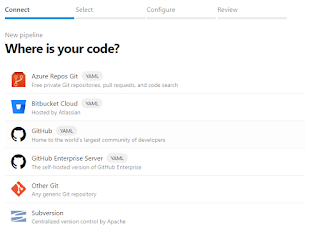
I started with creating an empty yaml pipeline and here you have different options to choose your repo from. I have my repo on Azure reports Git and will select that and choose my repo from the next screen.
Once you select your repo you will get some recommendations in the Configure
I picked up the starter pipeline to get the basic pipeline in place, which will checkout the branch based on the trigger branch, which by default will be master.
Once you select the Starter pipeline you will get something like this.
# Starter pipeline
# Start with a minimal pipeline that you can customize to build and deploy your code.
# Add steps that build, run tests, deploy, and more:
# https://aka.ms/yaml
trigger:
- master
pool:
vmImage: 'ubuntu-latest'
steps:
- script: echo Hello, world!
displayName: 'Run a one-line script'
- script: |
echo Add other tasks to build, test, and deploy your project.
echo See https://aka.ms/yaml
displayName: 'Run a multi-line script'
we will start to make changes to the pipeline.

